Salesforce Setup Guide
This guide will walk you through setting up your Salesforce connection, ingesting your data, and scheduling automated ingestions.
Launch Flow in Snowflake
In your Snowflake account, use the left sidebar to navigate to Catalog » Apps and select FLOWBYCORIDORS.
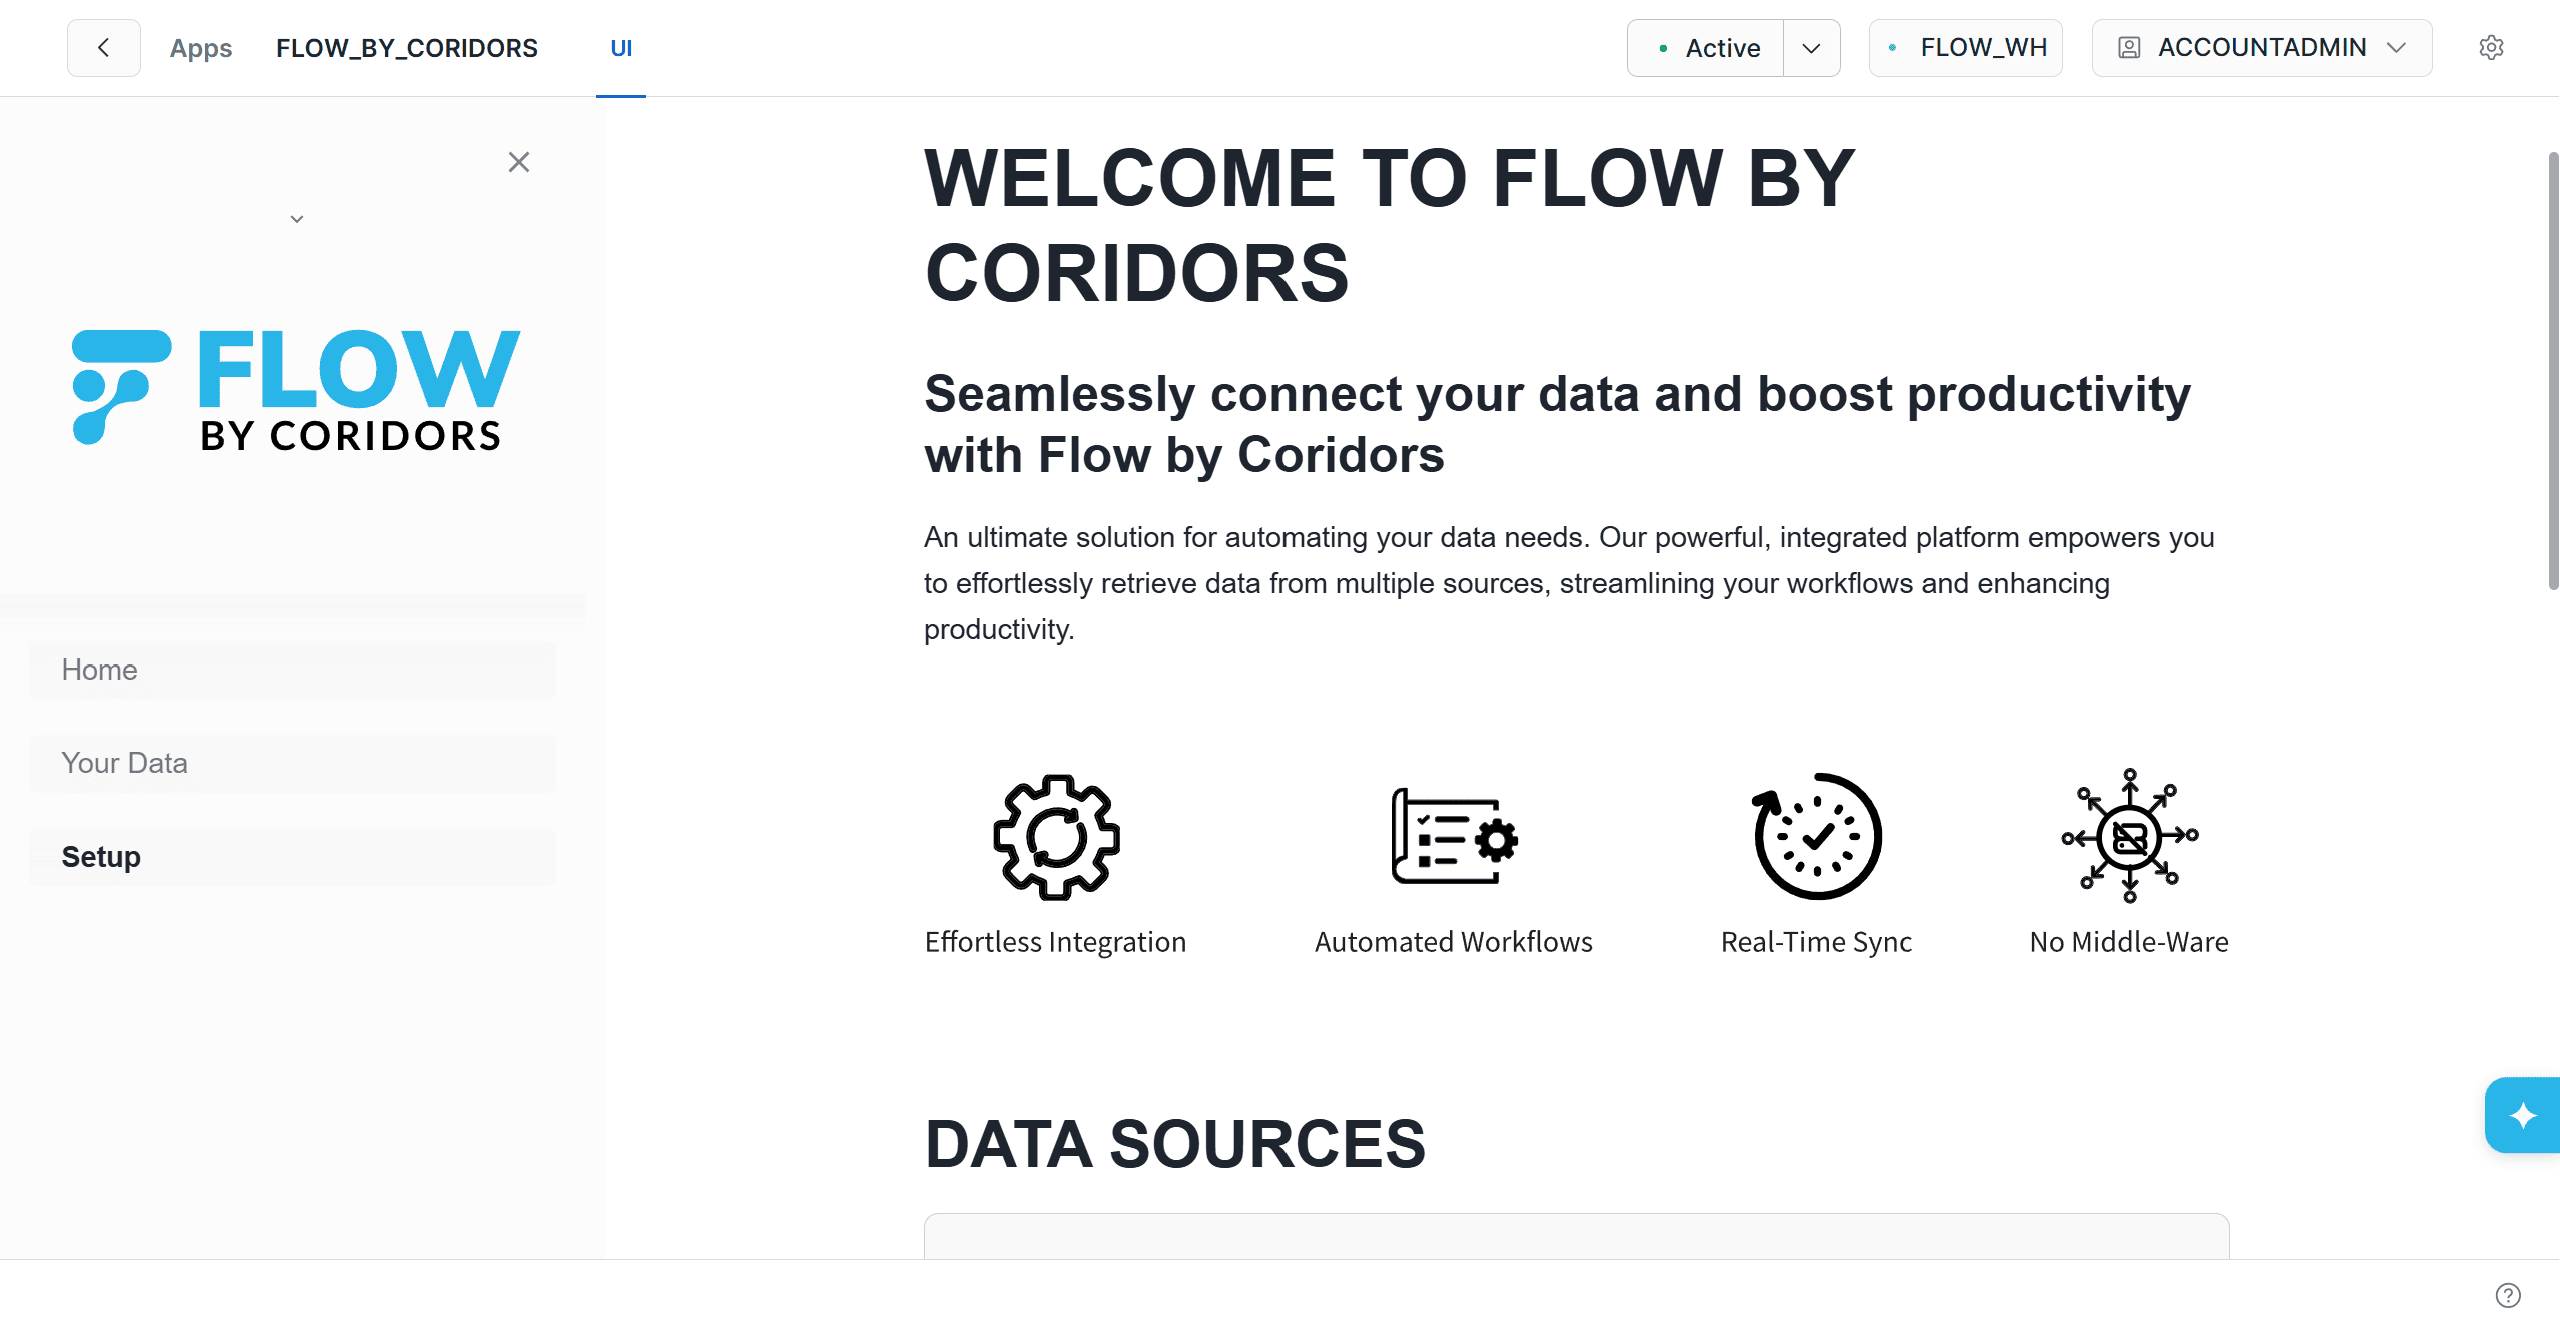
It should automatically open the Setup page if not from the left-side navigation panel, click Setup to access the data ingestion configuration page. Scroll below and under the Data Sources section, click on Lets get started.
Setup Data Ingestion
The Setup Data Ingestion wizard guides you through five stages:
- Select Data Source,
- Create Connection,
- Create Ingestion,
- Ingestion Details, and
- Schedule Ingestion.
Each stage is tracked in the progress indicator at the top of the page.
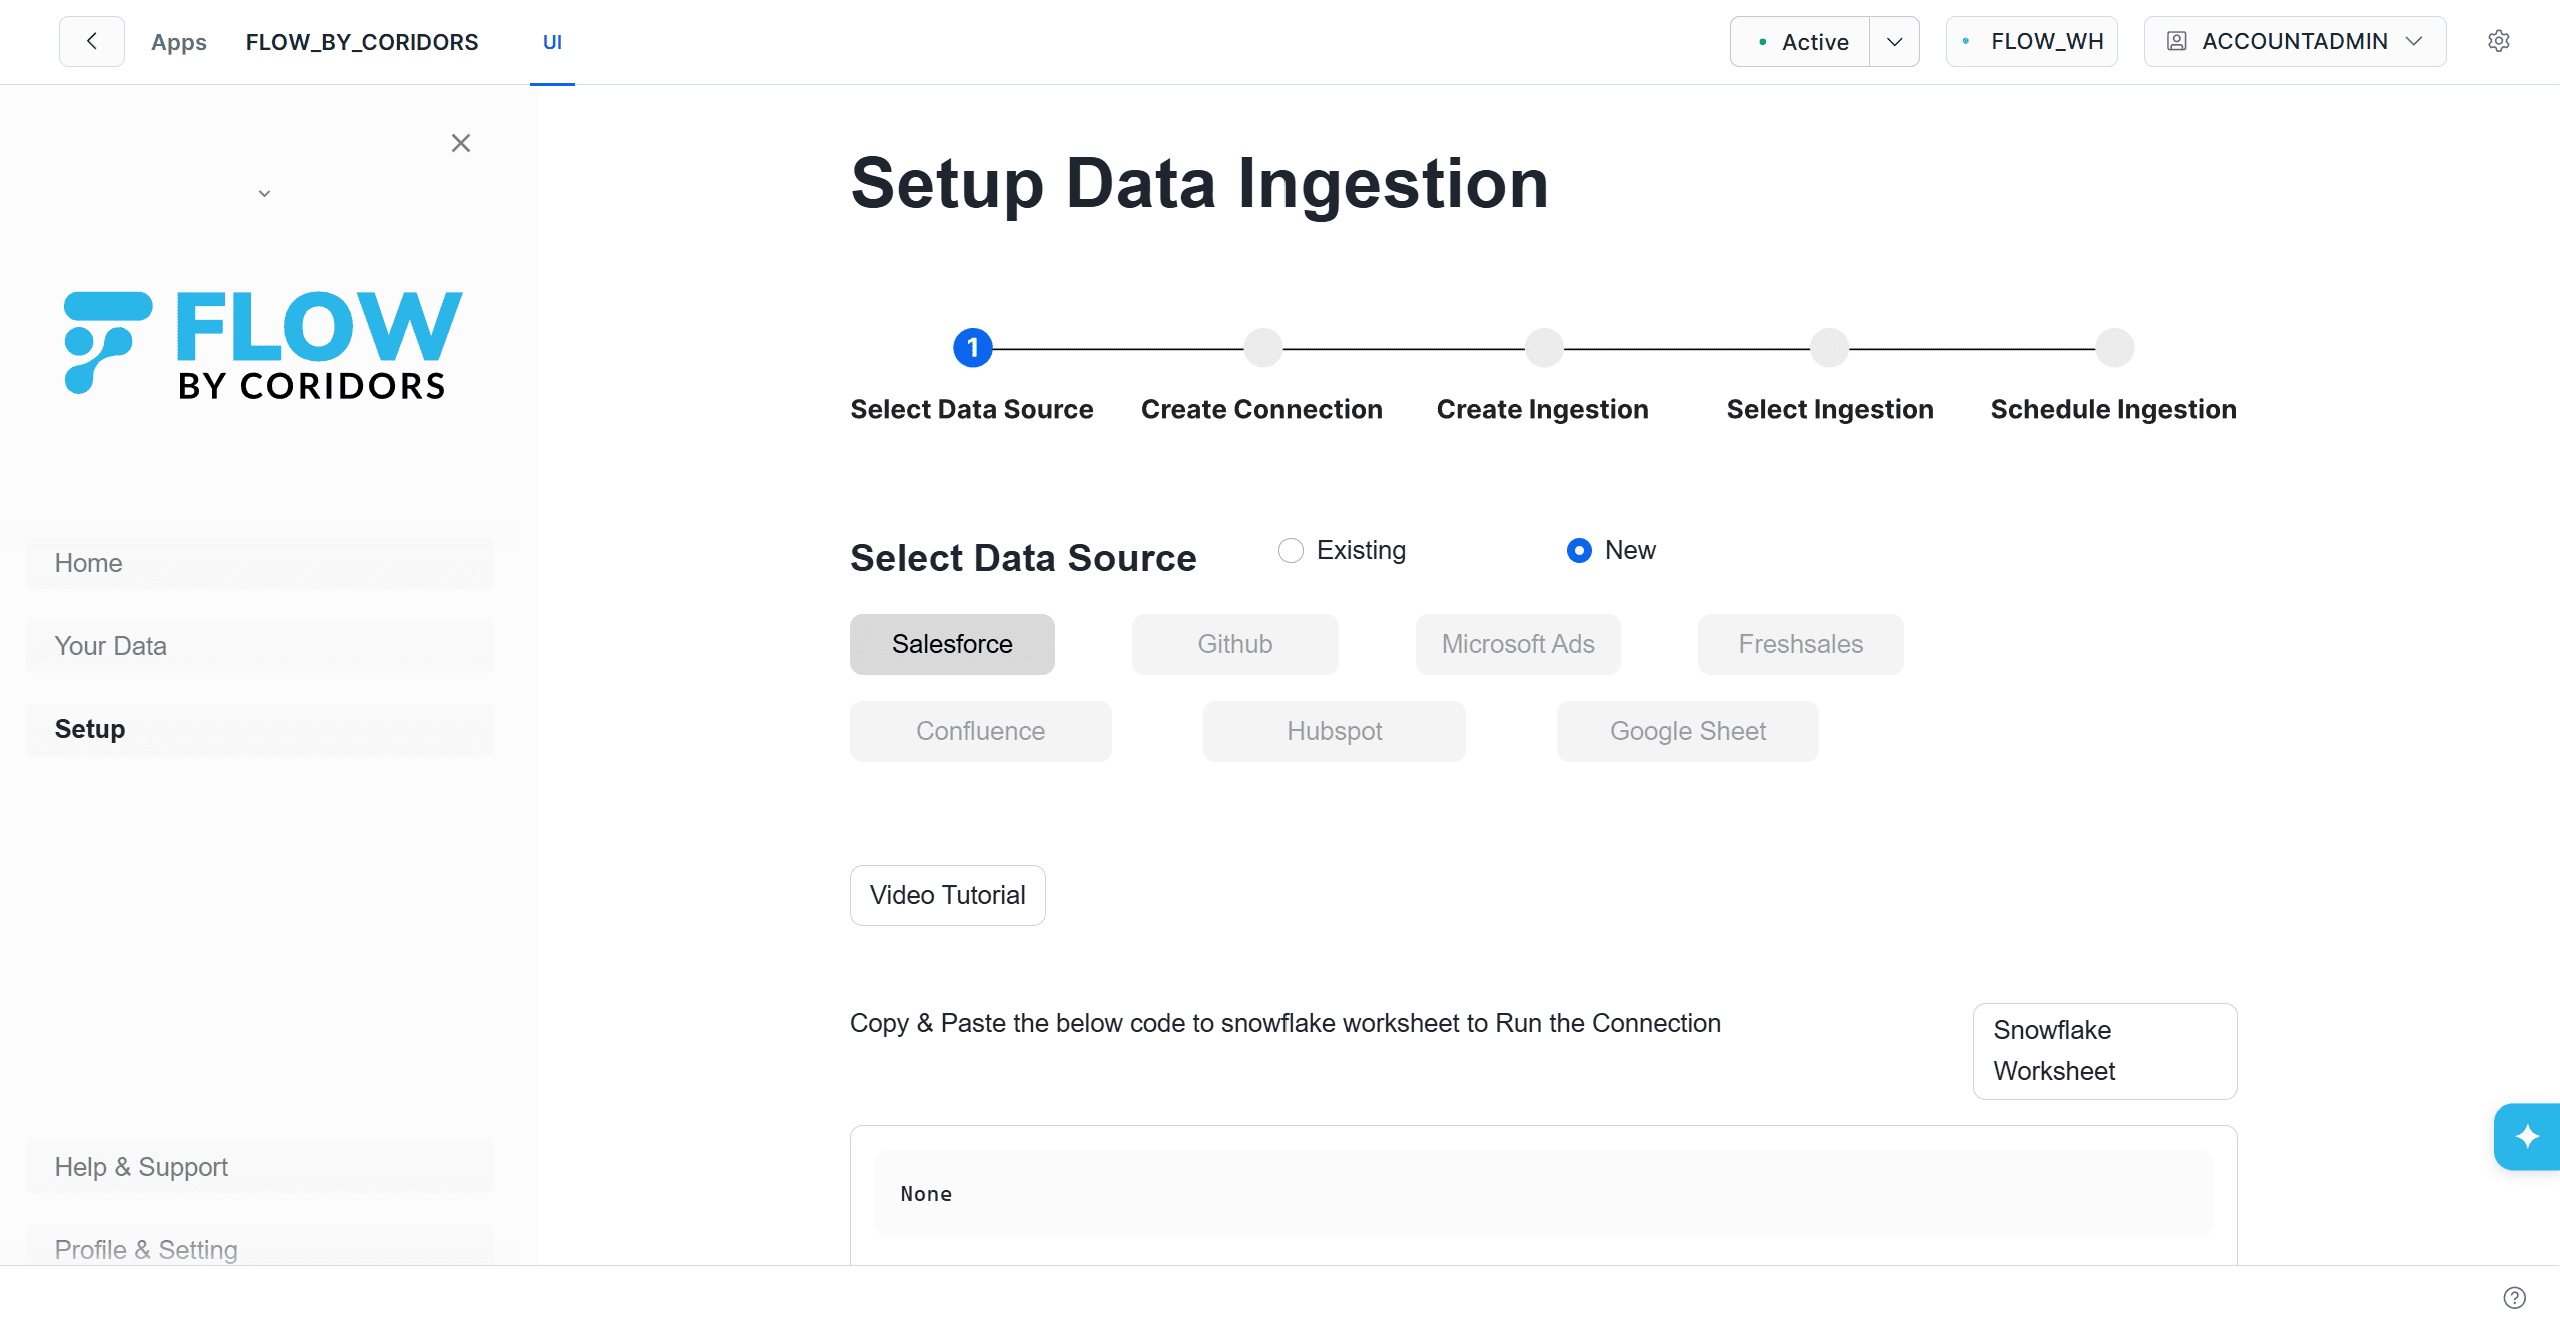
Select Data Source
On the Setup Data Ingestion page, select New under Select Data Source. Choose the required data source connector from the available options to begin creating a new connection and click on Check & Continue.
Create Connection
Enter Connector Credentials
Enter a name for the connection in the Connection Name field. Provide the required connector credentials, including the username, password, and security token. Select the appropriate environment (Production or Sandbox), then click Create Connection to establish the connection.
Create Connection — Review and Confirm
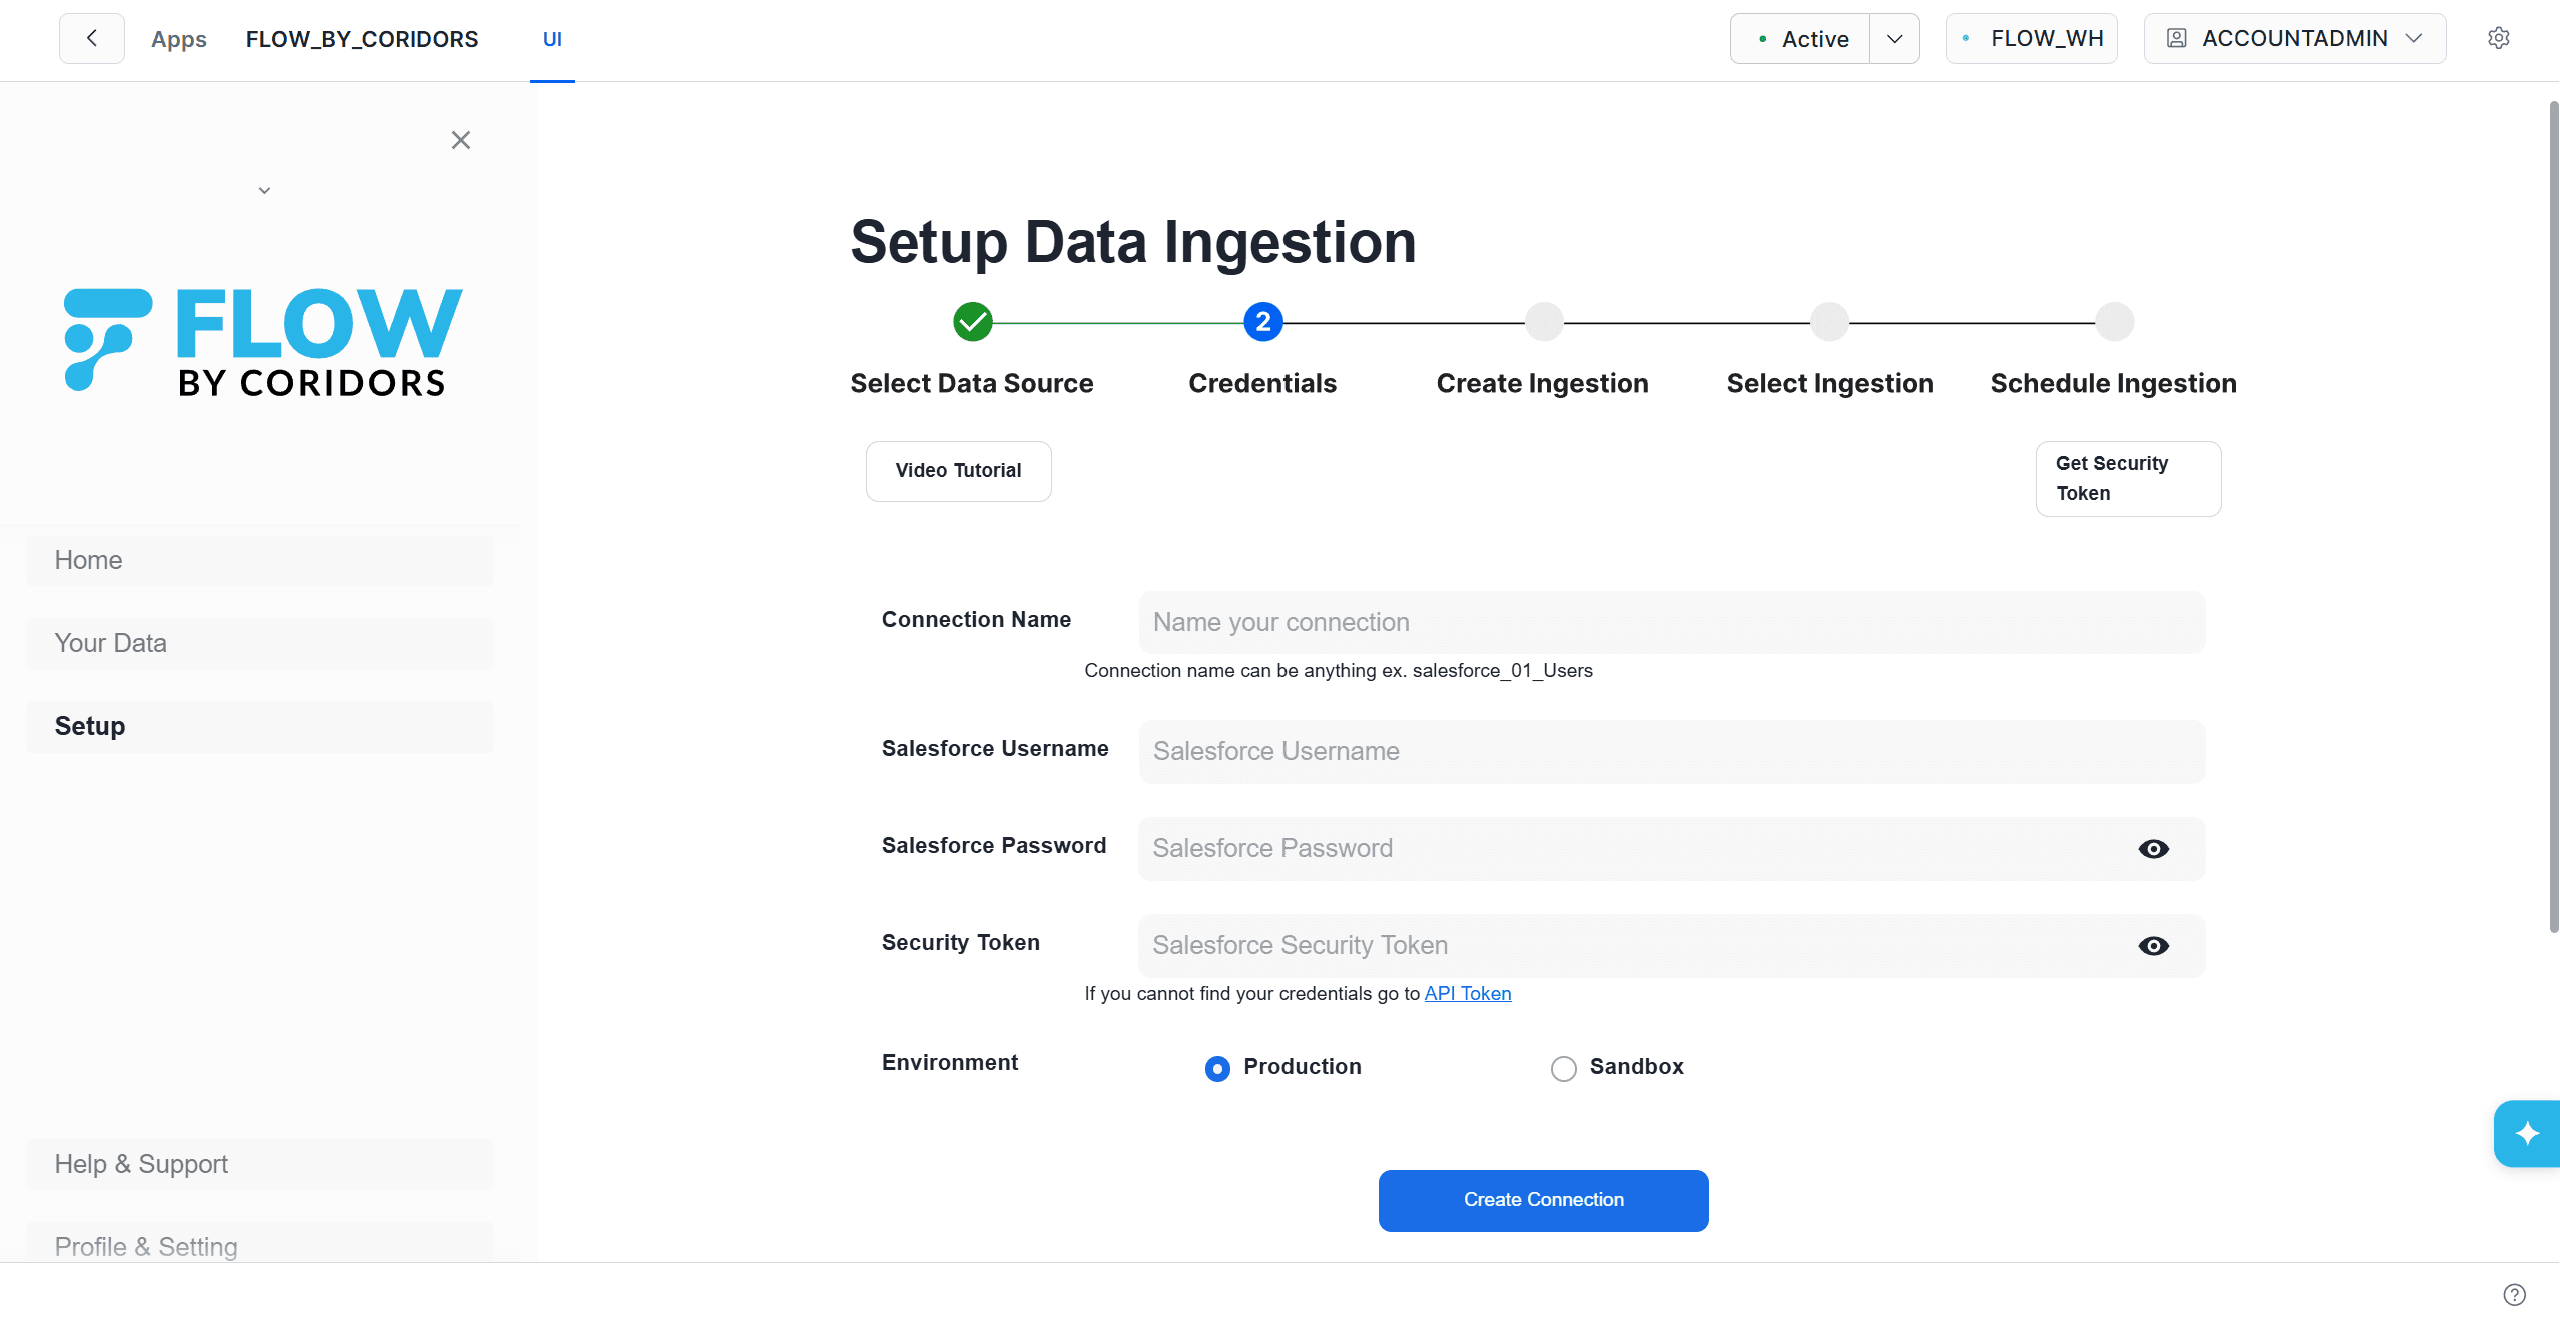
Review the entered Salesforce connection details, including the Connection Name, Username, Password, Security Token, and Environment. Click Create Connection to initiate the Salesforce connection setup.
How to get Salesforce security token:
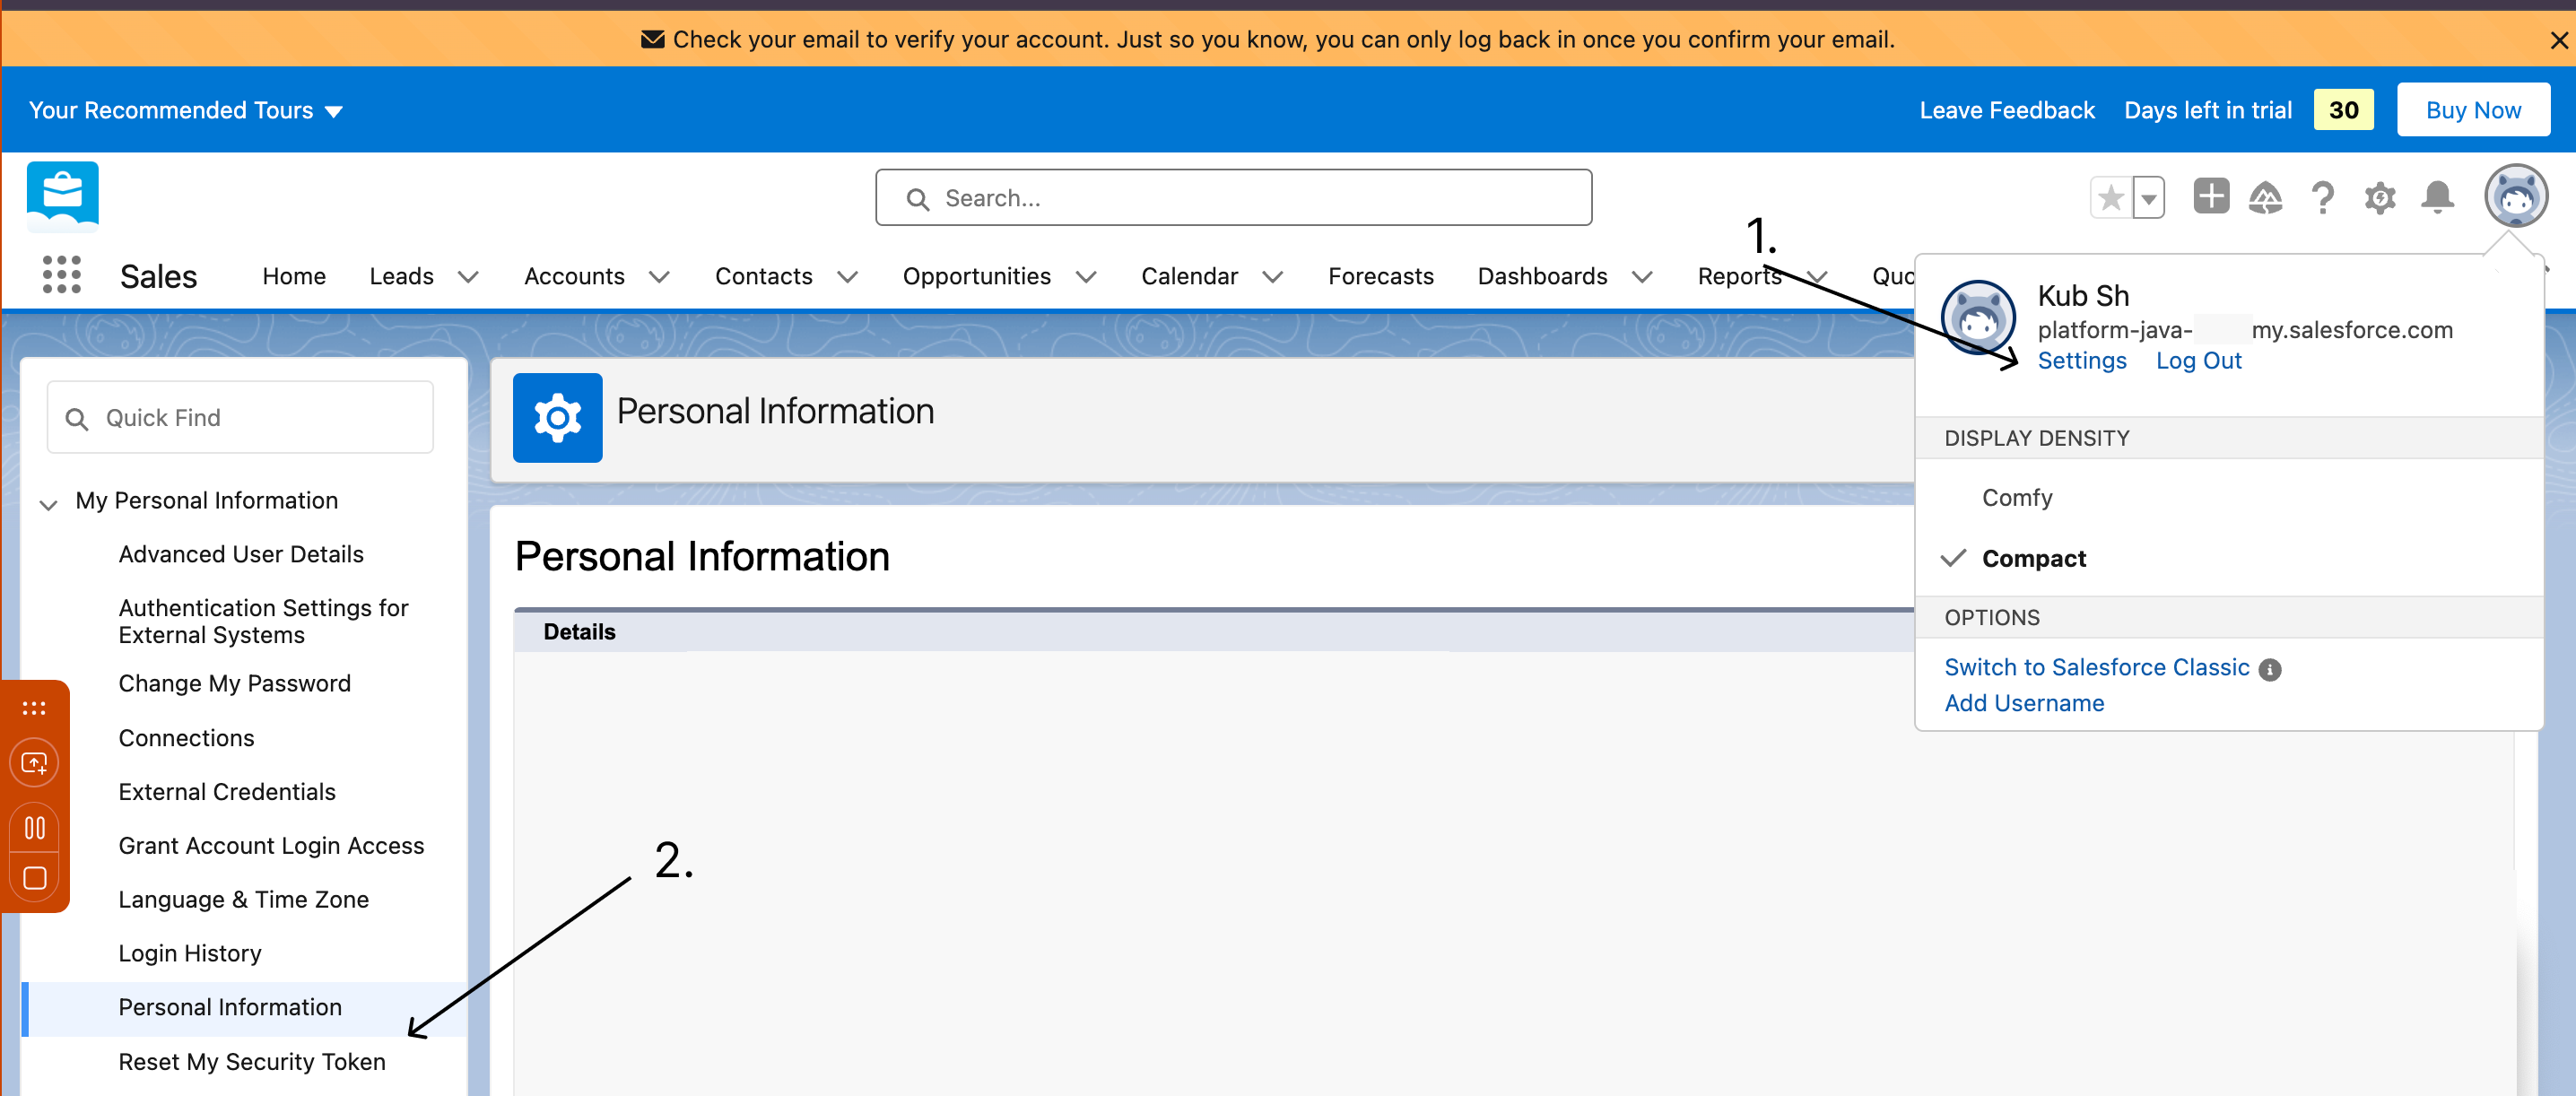
- Go to your settings and select Reset My Security Token.
- Click Reset Security Token
For more help, please read this guide from Salesforce.
Approve External Access
After the connection is created, the Setup Data Connection page will display an Approve External Access notification. FLOW requires approval to access the external Salesforce API endpoint from within Snowflake. Two methods are available to complete this step.
Method 1: Refresh Browser (Recommended)
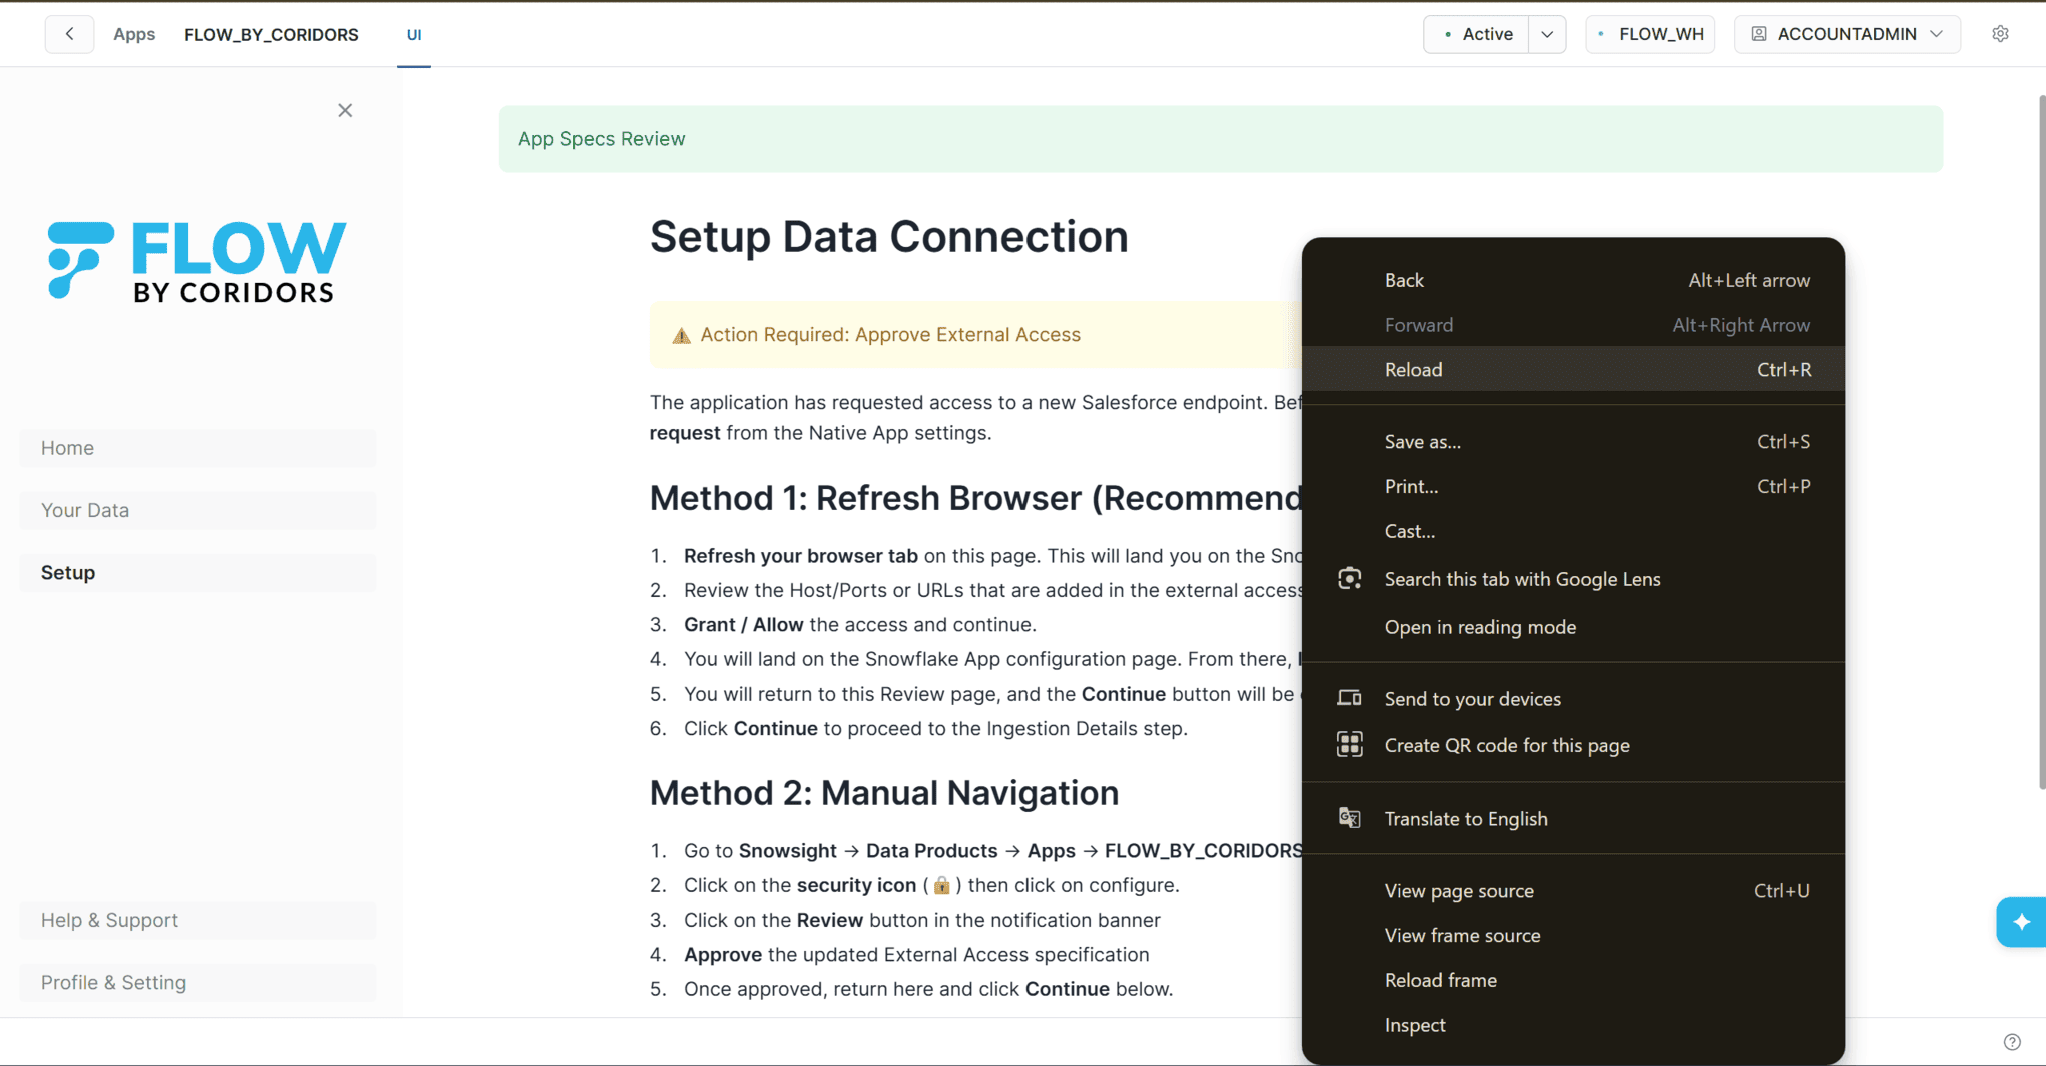
Refresh the browser tab using your browser’s reload function or by pressing Ctrl+R (Reload). This will redirect you to the Snowflake App Review and Allow page. Review the Host, Ports, or URLs listed in the external access specifications, then click Grant / Allow to continue. You will land on the Snowflake App configuration page. Launch the app from there, and the Continue button will be enabled on the Review page. Click Continue to proceed to the Ingestion Details step.
Method 2: Manual Navigation
Navigate to Snowsight > Data Products > Apps > FLOWBYCORIDORS. Click the security icon and then click Configure. In the notification banner, click Review. Approve the updated External Access specification. Once approved, return to the Flow application and click Continue.
Review External Access Integration
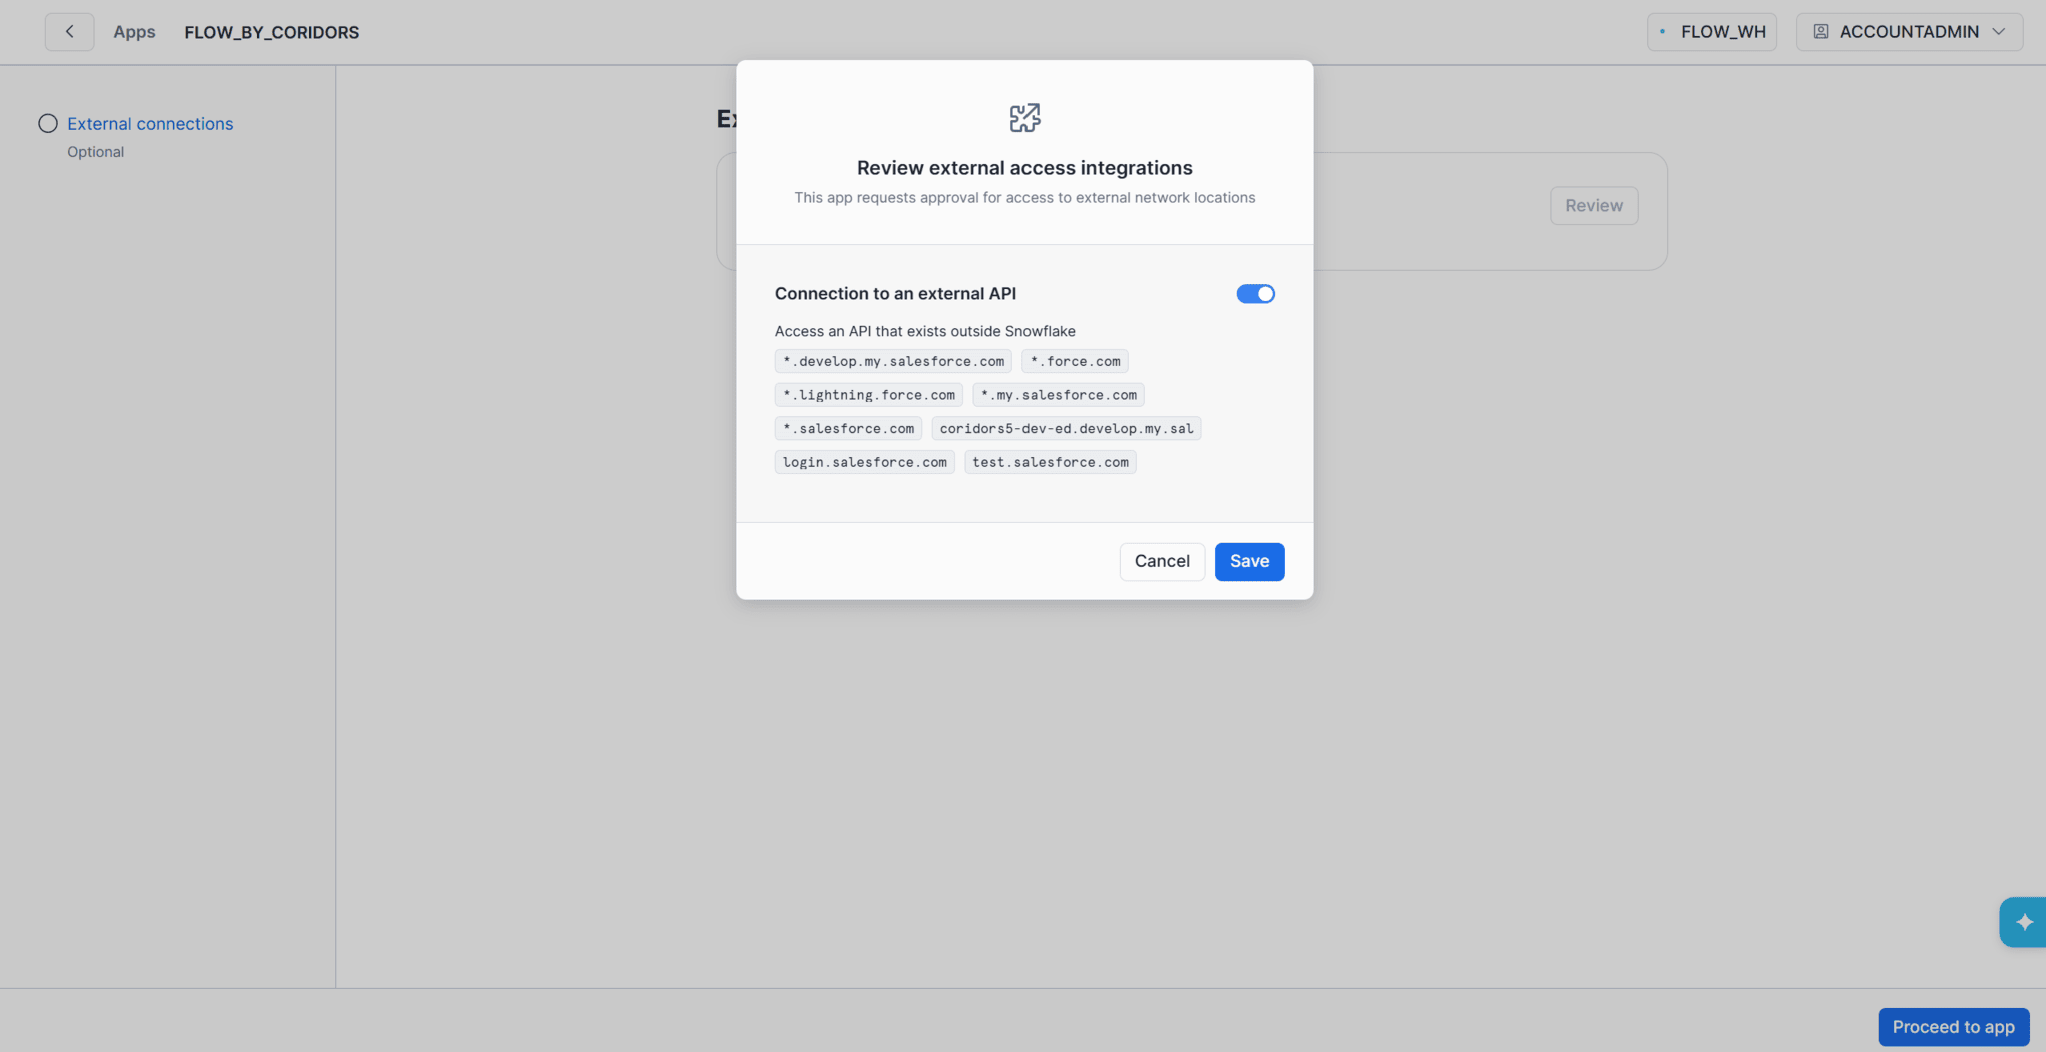
On the Snowflake External Connections page, locate the External access integrations section. Click Review to view the requested external network access permissions.
In the Review external access integrations pop-up window, verify the listed Salesforce API endpoints and external domains. Enable the toggle for Connection to an external API if it is not already enabled, then click Save to approve and apply the external access integration settings.
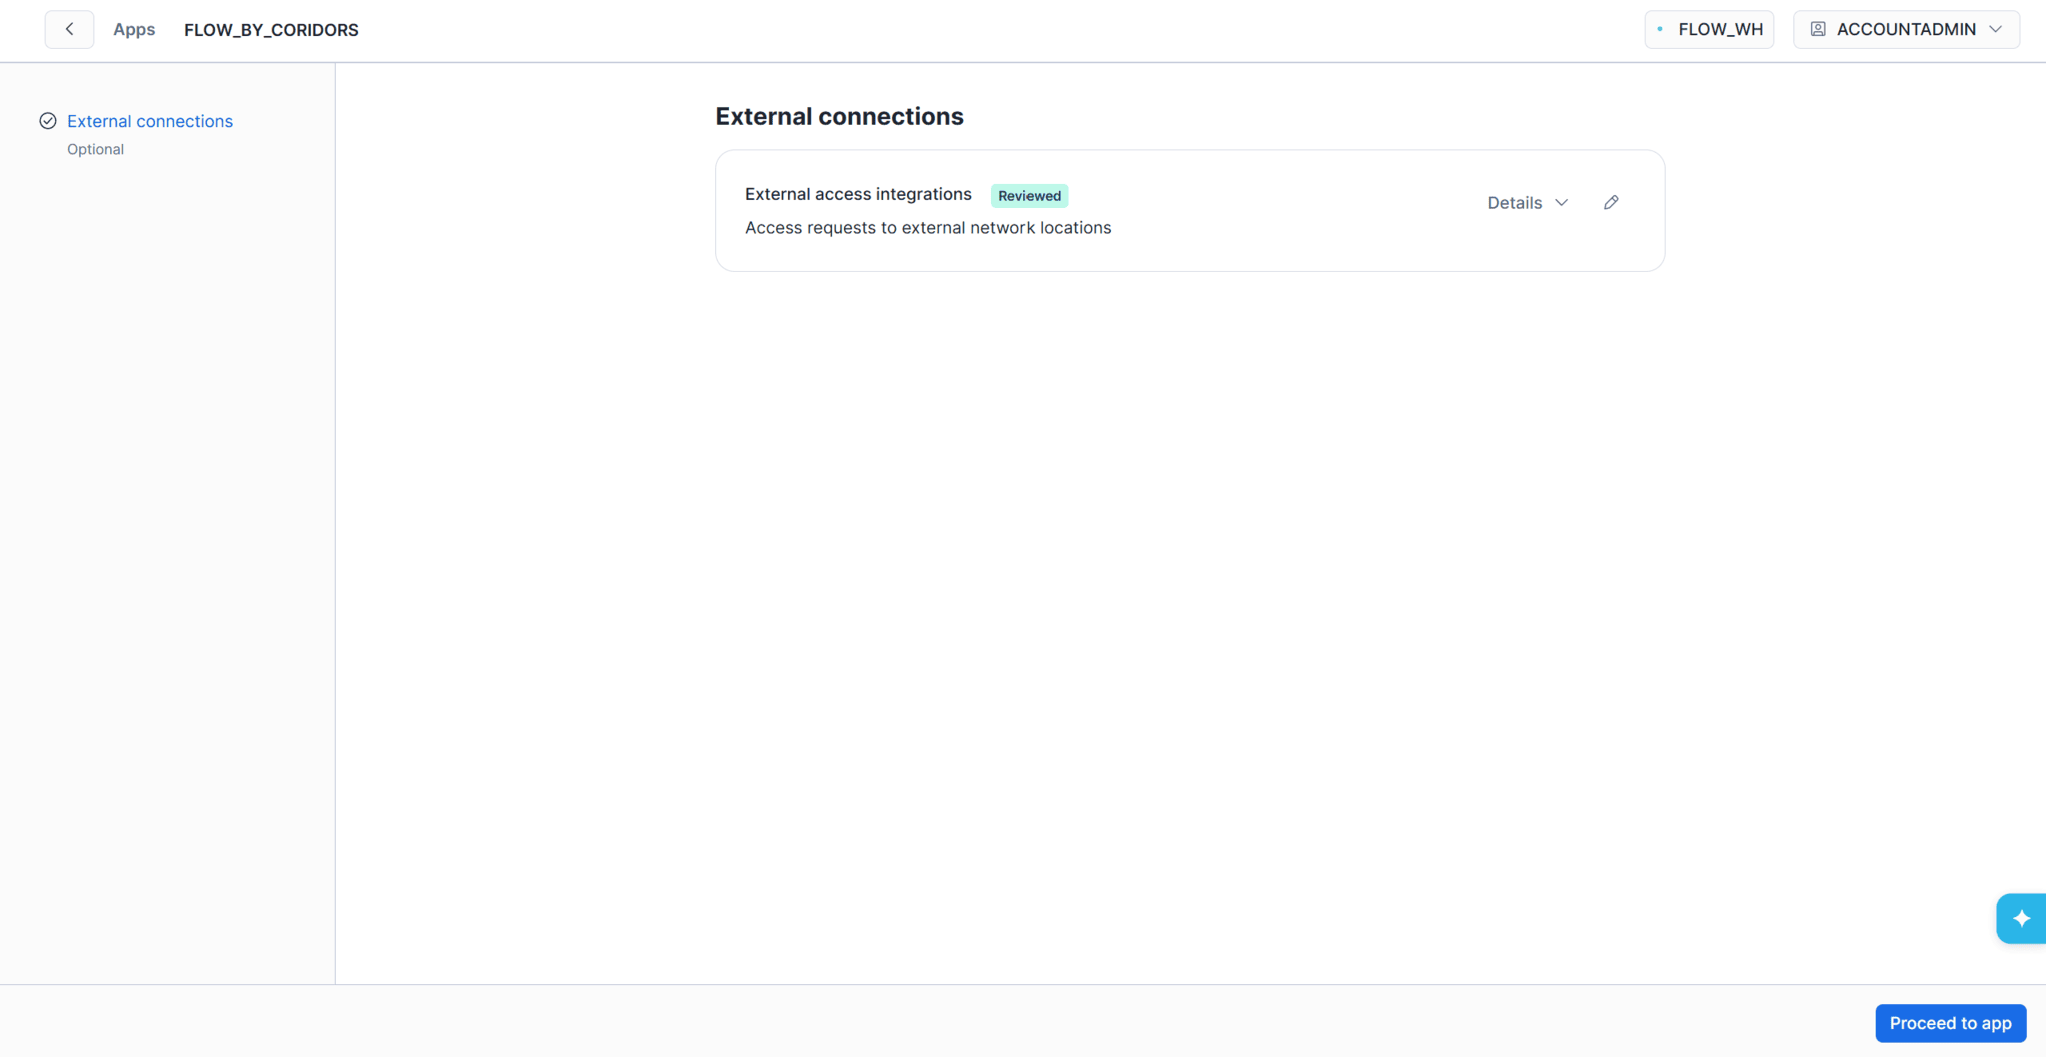
On the External Connections page, confirm the integration now shows a Reviewed status, then click Proceed to app to return to the Flow application.
Once redirected back to the Setup Data Connection page, click Continue to proceed to the ingestion configuration.
Create Ingestion
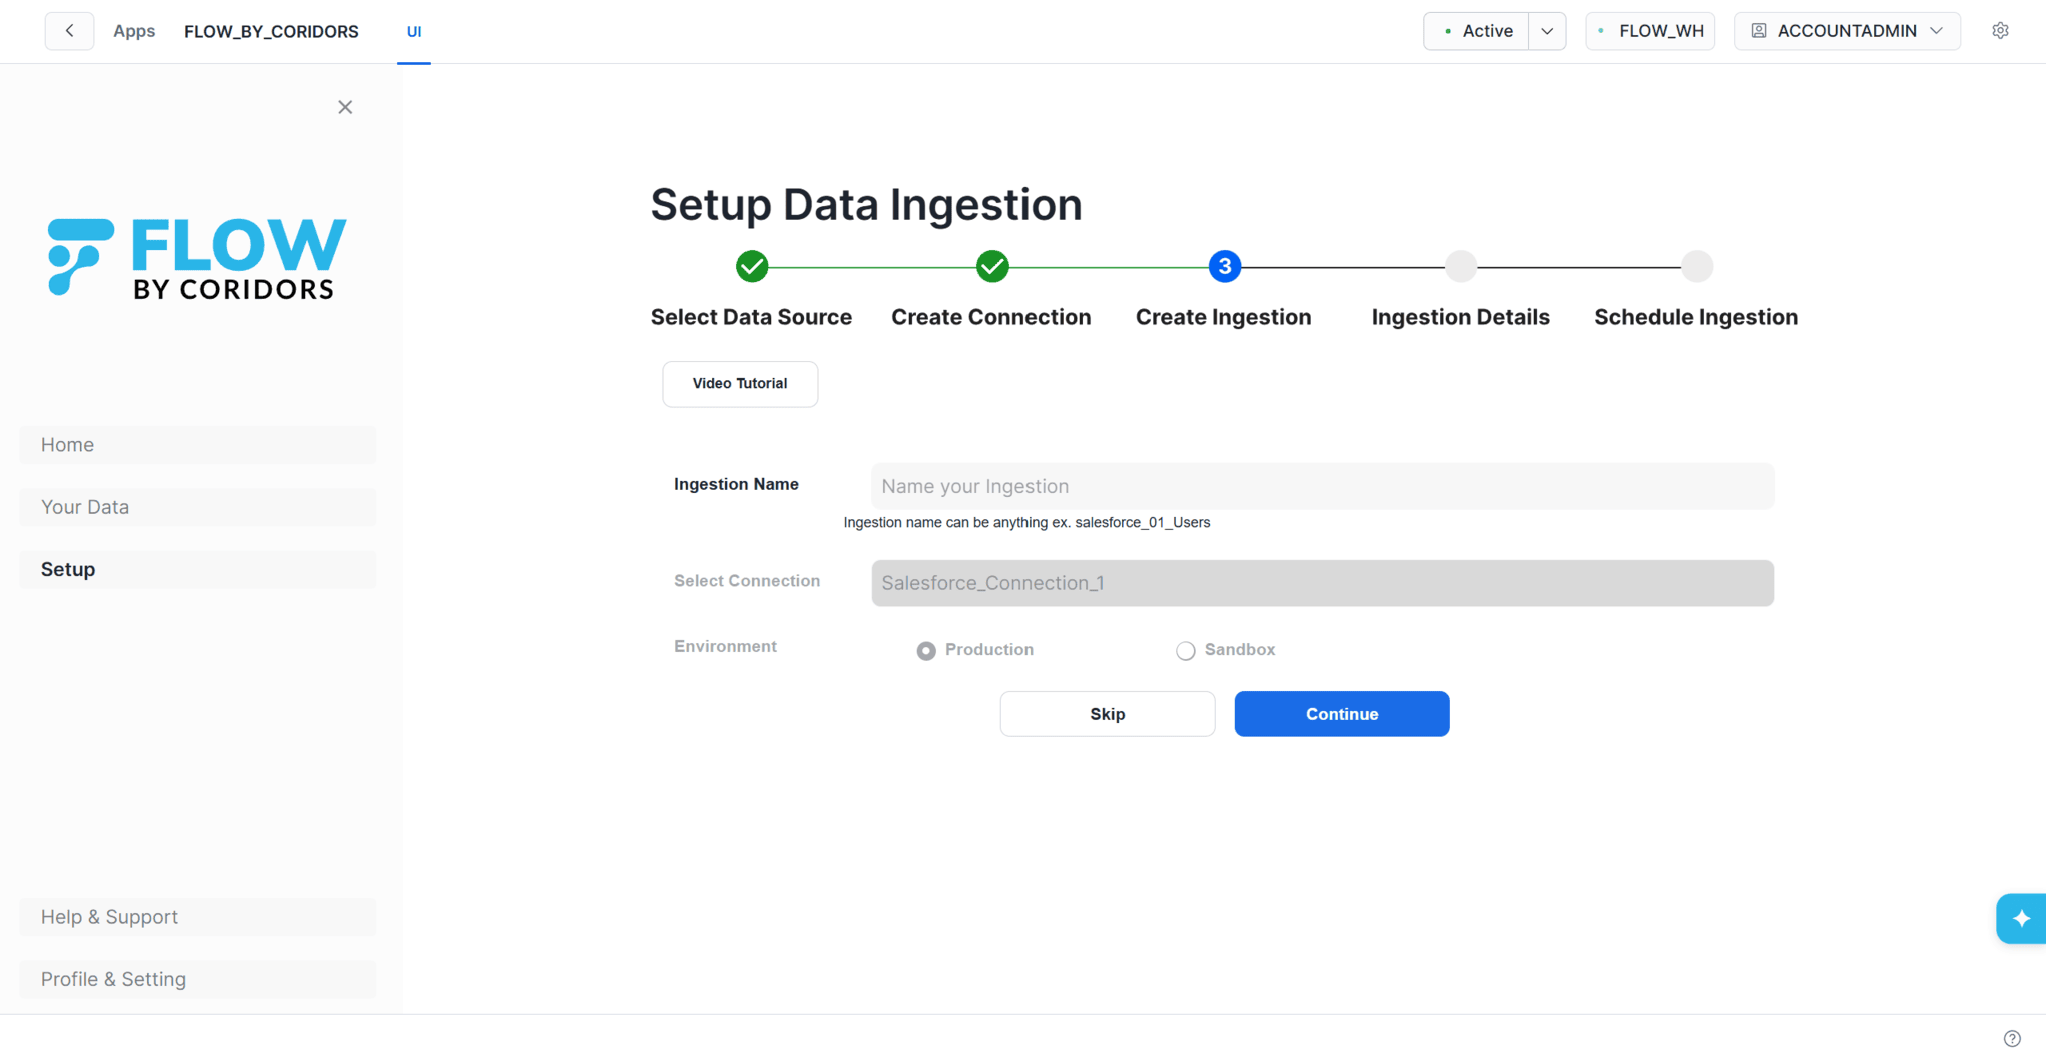
On the Setup Data Ingestion page, enter a unique name for the ingestion in the Ingestion Name field. Verify the selected Salesforce connection is displayed under Select Connection, and choose the appropriate environment (Production or Sandbox). Click Continue to proceed to the ingestion details configuration.
Ingestion Details
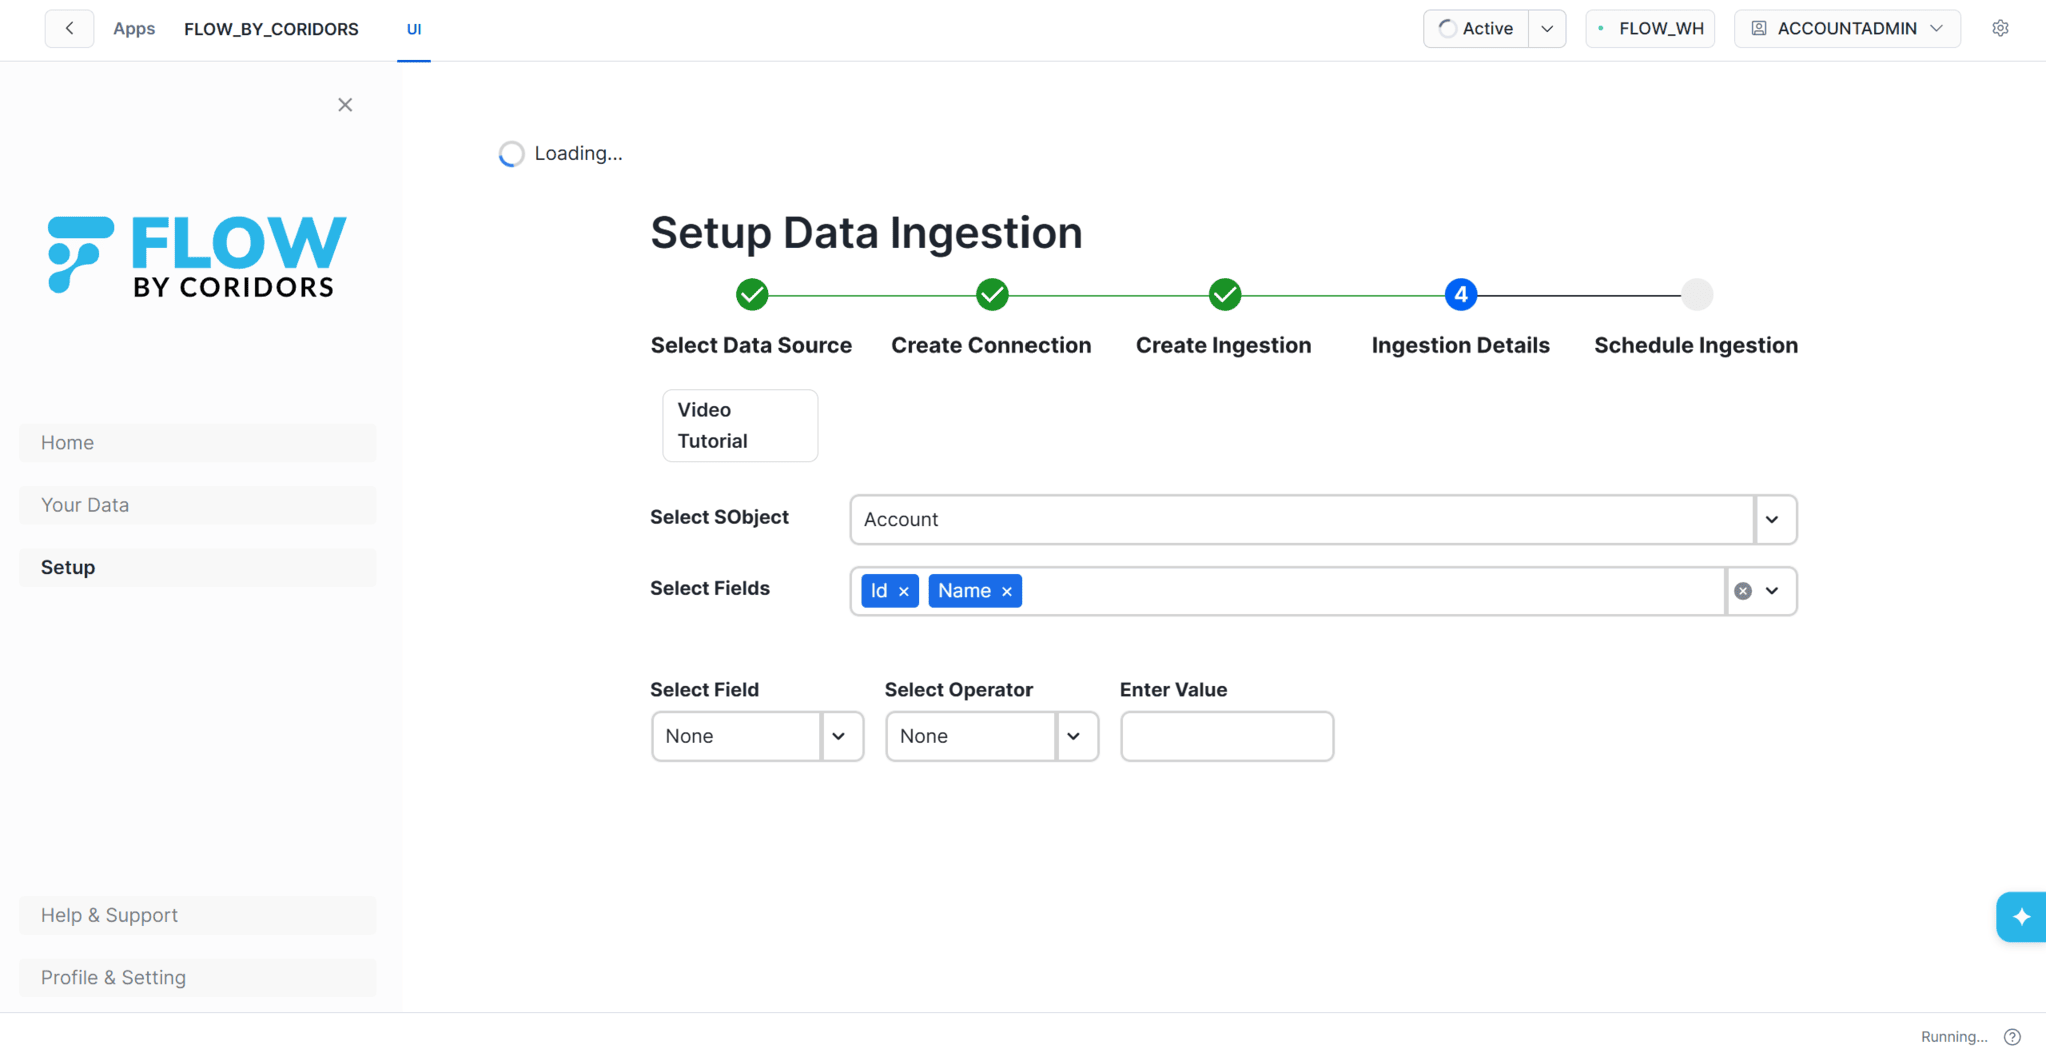
Select the Salesforce object to ingest from the Select Object dropdown. From the Select Fields dropdown, choose the fields to include in the ingestion. Optionally, configure record-level filters by selecting a field, an operator, and a value to limit the records being ingested.
Review Data and Create Ingestion
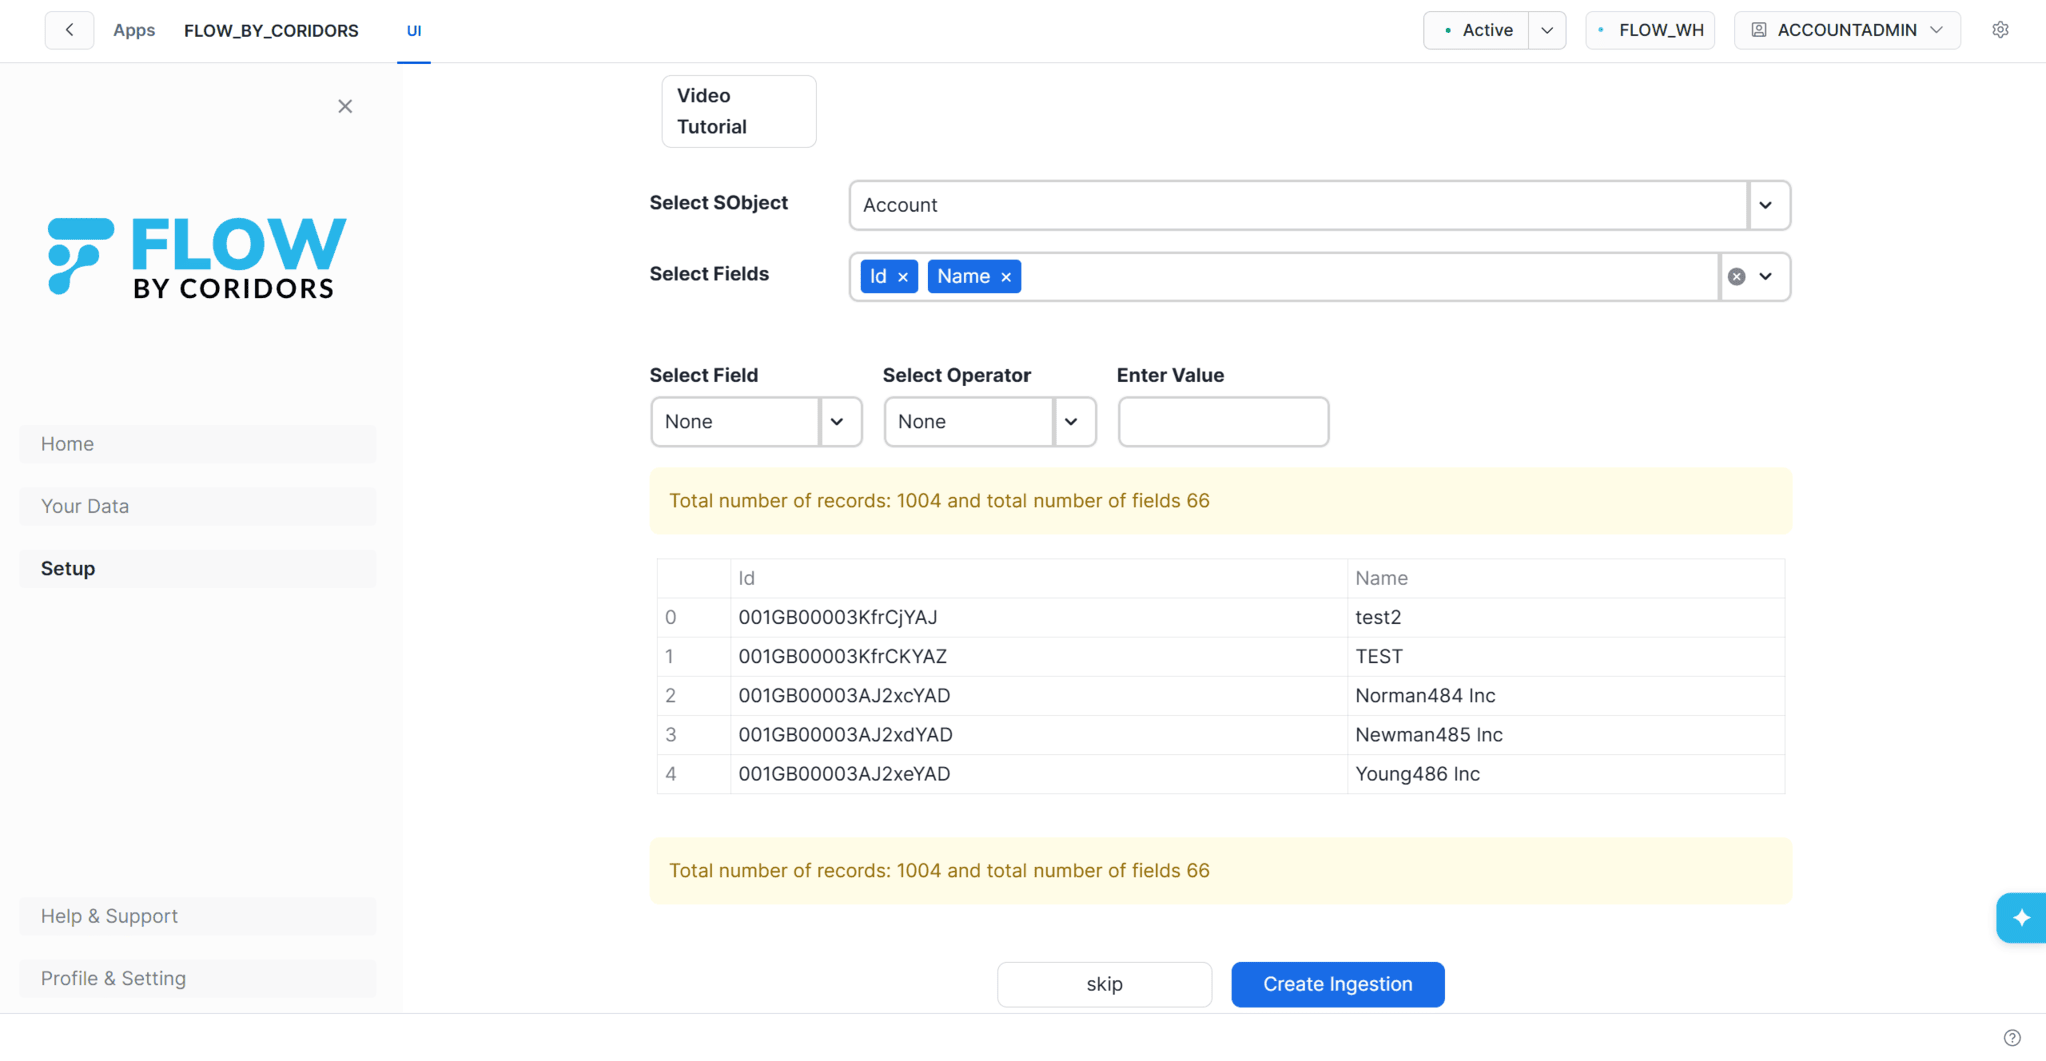
Review the preview of the retrieved Salesforce records and confirm the selected fields and filters. Verify the total number of records and fields displayed in the preview section. Click Create Ingestion to save the ingestion configuration and proceed to scheduling.
Schedule Ingestion
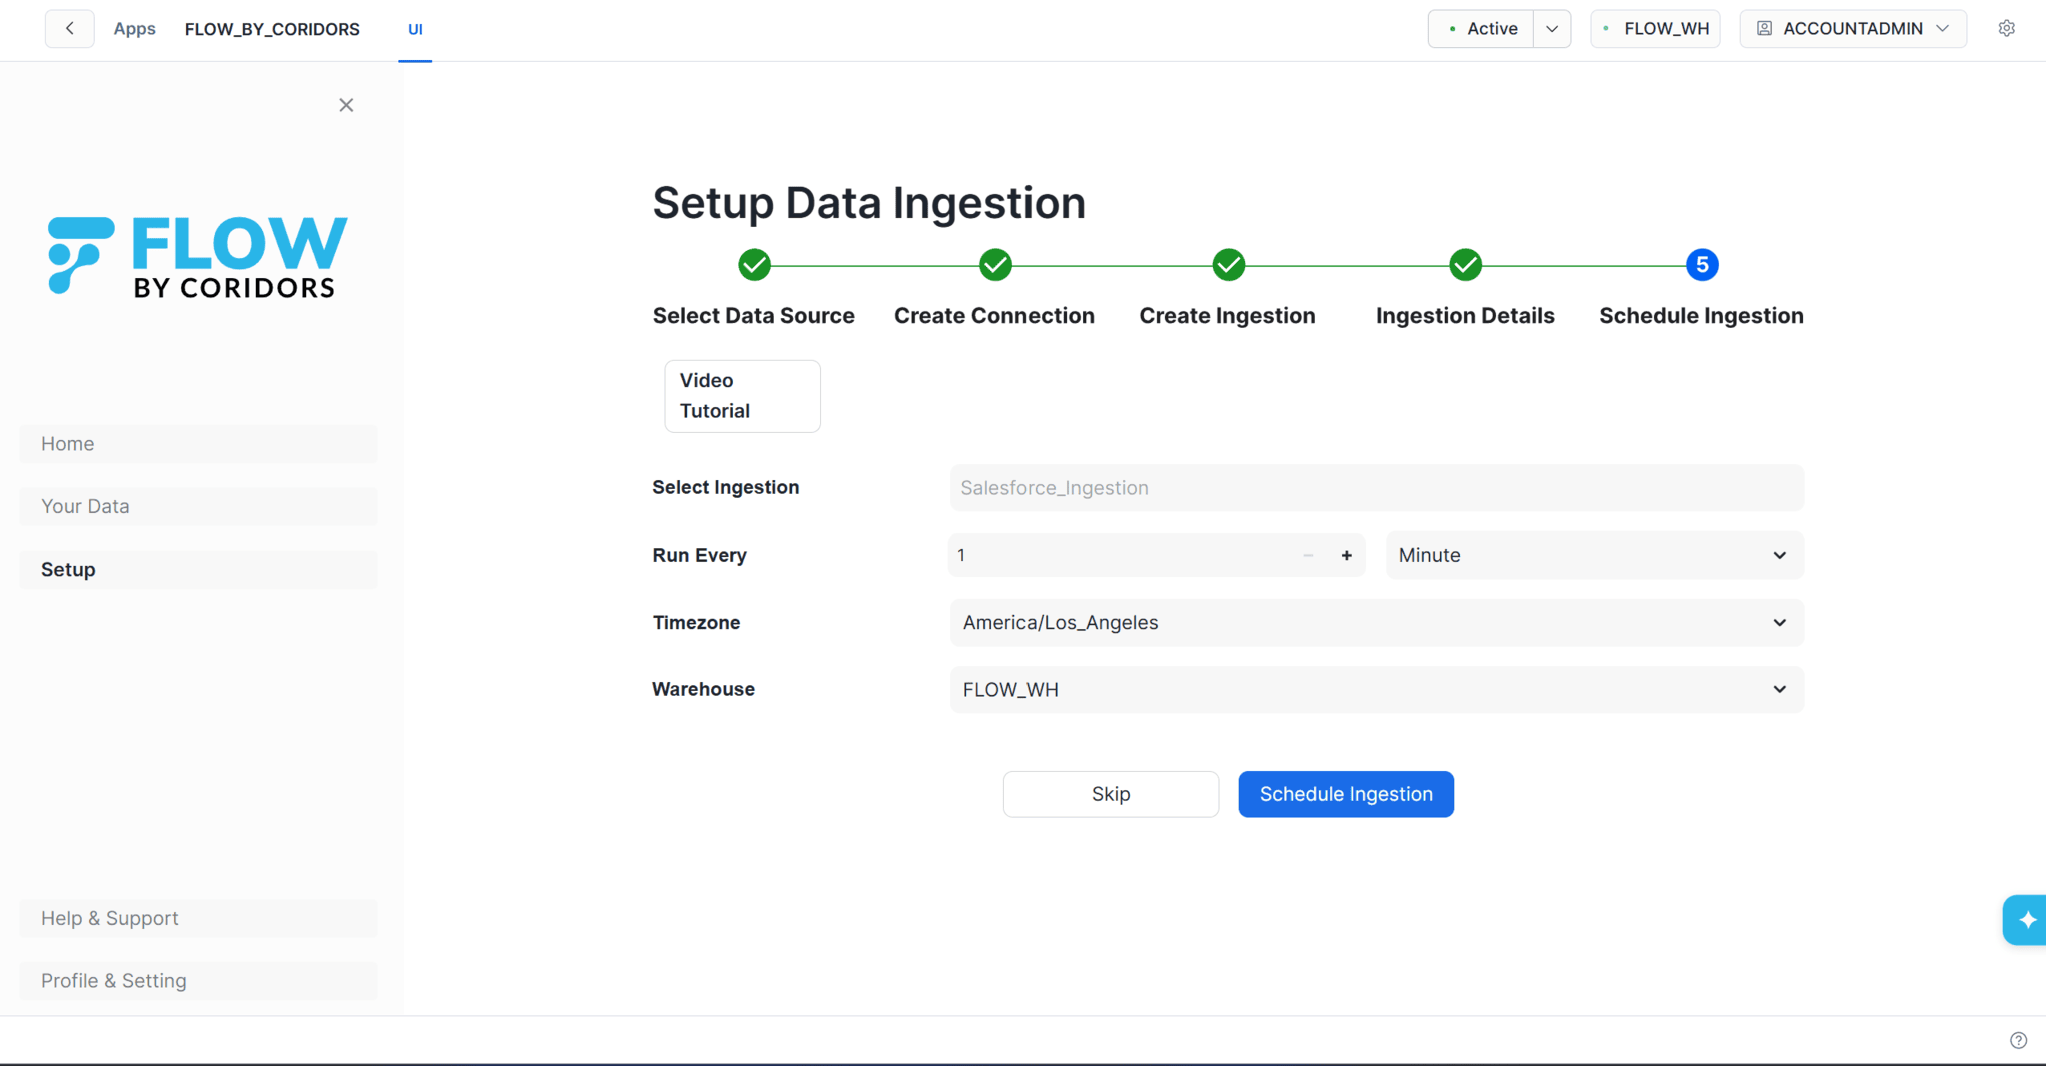
On the Schedule Ingestion page, review the selected ingestion name displayed in the Select Ingestion field. Configure the ingestion frequency by specifying the run interval and selecting the desired time unit. Select the appropriate timezone for the scheduled ingestion. Choose the Snowflake warehouse that will be used to execute the ingestion job. Click Schedule Ingestion to save the schedule and activate the ingestion pipeline.
Congrats, you’ve successfully setup the salesforce ingestion.